Vue Router 간단한 설명과 메뉴 네비게이션을 생성하는 기초 예제
*자세한 설명 생략
▷ Vue Router란?
페이지 간에 이동하는 기능을 구현할 때 사용하는 Vue 라이브러리
▷ Vue Router 설치
*vue-cli를 통해 Project 생성 후 설치
// vue-cli 3.x 이상
💡npm i vue-router@next --save
▷ 기초 예제 - 메뉴 네비게이션 생성
- MenuNav.js
*src 밑에 router 폴더 및 MenuNav.js 생성
*연결 컴포넌트는 이전에 생성했던 부분

import { createRouter, createWebHistory } from 'vue-router'

// 연결 컴포넌트
import ForTestCmp from '@/components/Test/ForTestCmp.vue'
import IfTestCmp from '@/components/Test/IfTestCmp.vue'
import CompositionTestCmp from '@/components/Test/CompositionTestCmp.vue'

// 라우터 설계
const routes = [
    { path: '/1', component: IfTestCmp },
    { path: '/2', component: ForTestCmp },
    { path: '/3', component: CompositionTestCmp }
]

// 라우터 생성
const router = createRouter({
    history: createWebHistory(),
    routes
});

// 라우터 추출
export { router }
- main.js
*생성한 라우터를 가져와서 사용
import { createApp } from 'vue'
import App from './App.vue'
import { router } from './router/MenuNav.js'

createApp(App).use(router).mount('#app')
- MenuCmp.vue
*<router-link> 를 통해 화면 이동
*Warning : vue-router.esm-bundler.js:72 [Vue Router warn]: No match found for location with path "/" 무시
<template>
    <div class="MenuCmp">
        <div>
            <h3><router-link to="/">🏠HOME</router-link></h3>
        </div><br />
        <div>
            <h3>💡TEST</h3>
            <h5><router-link to="/1">▷ IF TEST</router-link></h5>
            <h5><router-link to="/2">▷ FOR TEST</router-link></h5>
            <h5><router-link to="/3">▷ Composition TEST</router-link></h5>
        </div><br />
        <div>
            <h3>💡Sample</h3>
        </div>
    </div>
</template>
- App.vue
*<router-view> router에 연결된 Component를 화면에 노출
<template>
  <div class="HeaderCmp">
    <HeaderCmp />
  </div>
  <div class="wrap" style="display: flex;">
    <div style="flex: 1;">
      <MenuCmp />
    </div>
    <div style="flex: 2;">
      <router-view />
    </div>
  </div>
</template>

<script>
import HeaderCmp from '@/components/HeaderCmp.vue'
import MenuCmp from '@/components/MenuCmp.vue'

export default {
  components: {
    HeaderCmp,
    MenuCmp
  }
}
</script>
- Cmp.css
*<router-link> 로 인해 생성된 밑줄 제거 및 글자 색 지정
*<router-link>는 html에서는 <a>태그로 사용 됨
a {
text-decoration: none;
color: black;
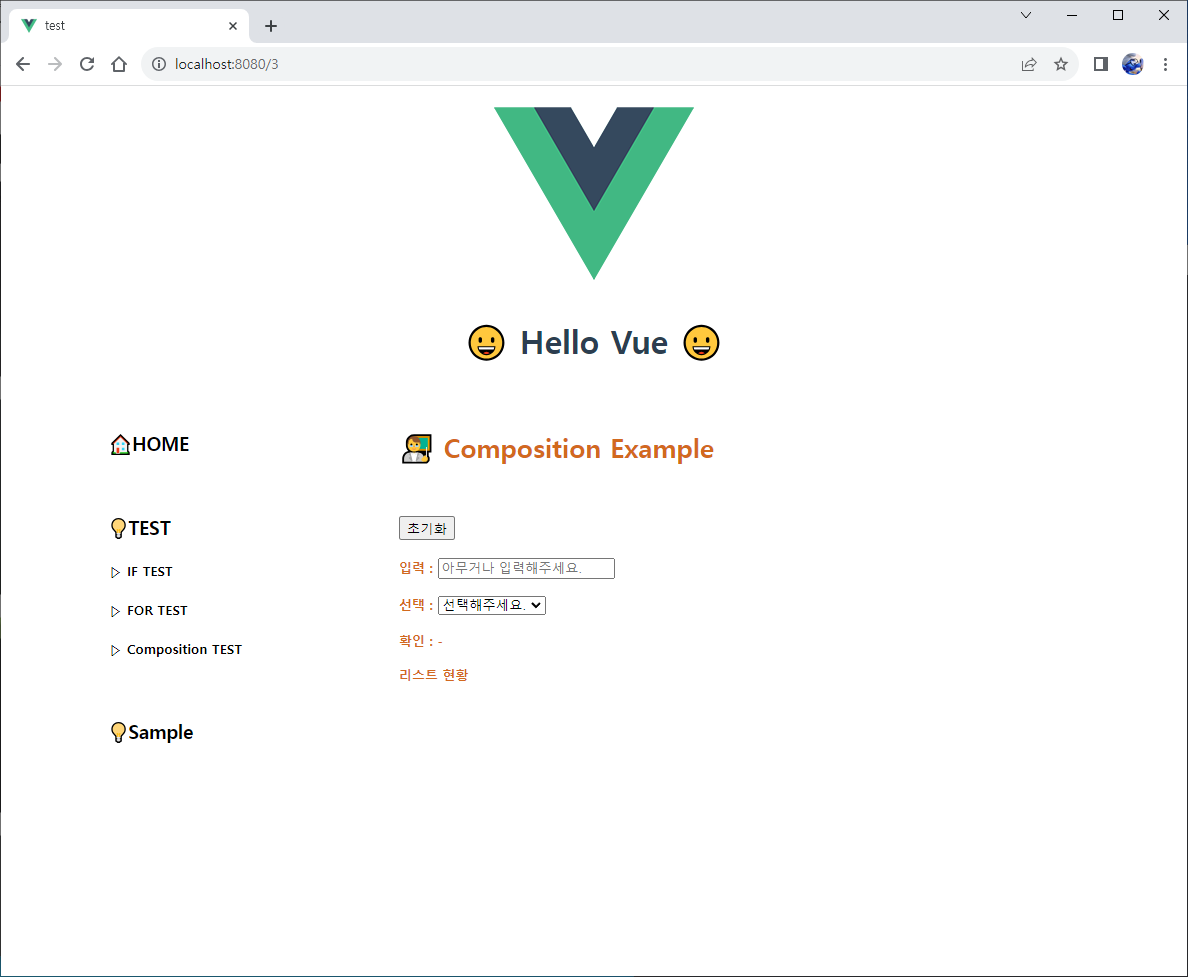
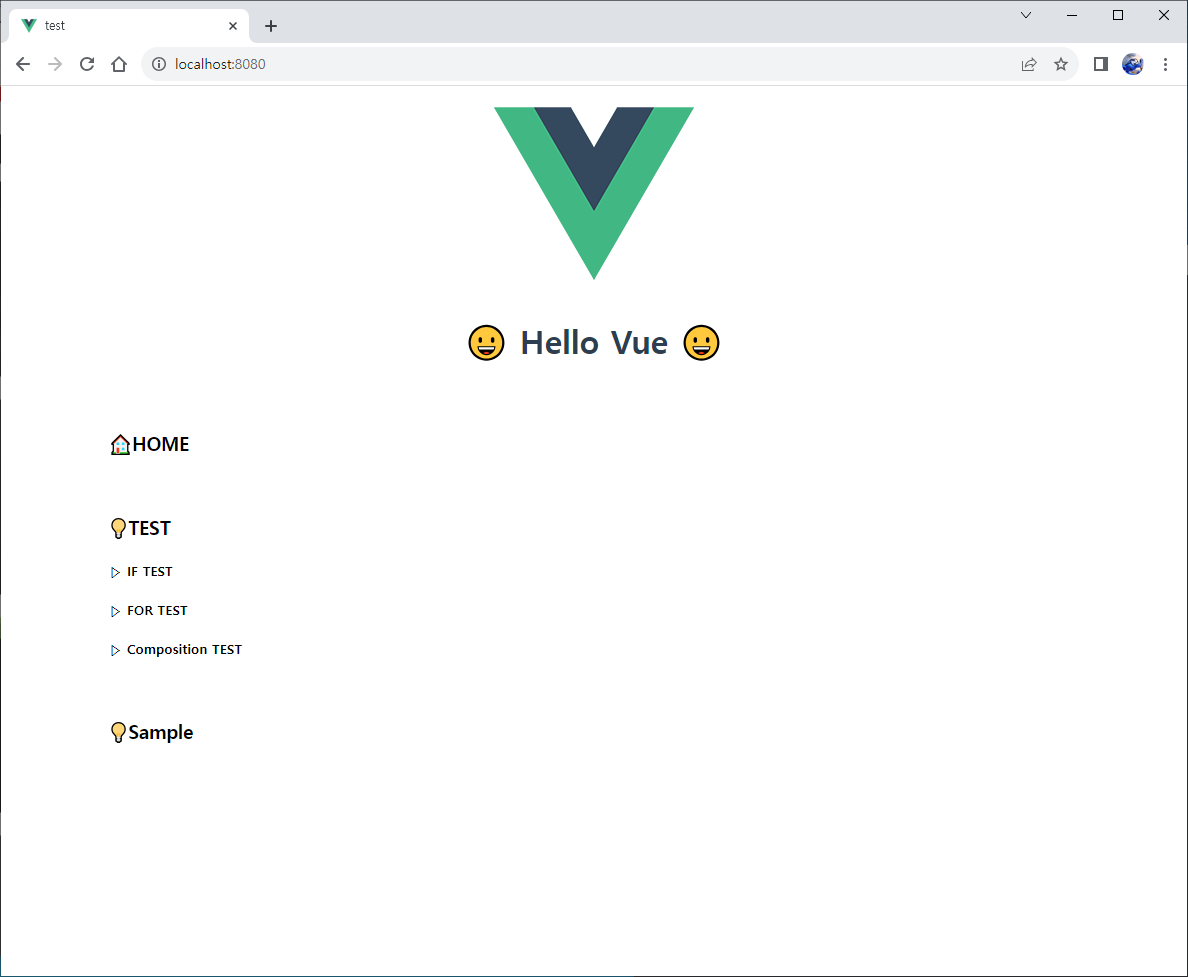
}▷ 결과 화면


▷ 참고
[Vue3] Router 사용하기 (+ 동적 라우팅)
Vue CLI에서 Router를 설치하고 사용합니다. 각 옵션에 대한 내용과 함께 동적 라우팅도 설정합니다.
yemsu.github.io
▷ 관련 글
Vue3 기초 예제 프로젝트 정리
Vue3 기초 예제 프로젝트 구조 및 소스 중간 정리 *관련 글이 점점 늘어나 하나로 통합하기 위함 *이 글에서 만 싱크 맞춤 *주석 이외 설명 생략 *자세한 설명 생략 ▷ 프로젝트 전체 구조 < 파일 따
coding-today.tistory.com
'▶ Front-End > Vue.js' 카테고리의 다른 글
| Vue3 기초 예제 - 로그인(pinia) (2) | 2023.10.30 |
|---|---|
| Vue3 기초 예제 - HTTP 통신(Axios) (2) | 2023.10.27 |
| Vue3 기초 예제 - Dynamic Select Box (0) | 2023.10.25 |
| Vue 기초 예제 - Directive(조건/반복) (0) | 2023.10.23 |
| Vue3 Project 생성 및 실행 (0) | 2023.10.20 |


댓글